Category: category_2990

  • How To Disable CD or DVD Auto Eject in Windows Vista, 7 and 8

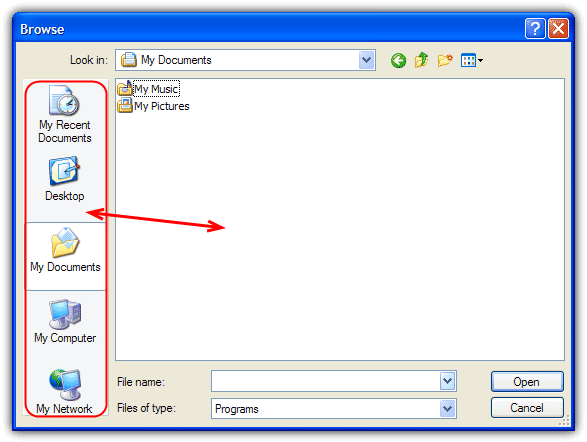
    Something introduced into Windows Vista and and is still there in Windows 7 and 8 was that if you don’t have a disc in your CD or DVD drive and you click on the drive in Windows Explorer (or double click on it in Computer), Windows will very kindly open the drive tray for you to insert one. On the face of it, this may seem like a nice thing to have, but quickly gets annoying if you sometimes click on the drive by mistake. This is especially true when your drive is hidden behind a door in your case, the tray will just hit the back of it.

    Insert A Disc

    Although it sounds like a very trivial thing, in Windows there is no setting available to change it where you can just tell Windows not to eject the drive tray. It seems that auto eject is hard coded into Windows and there is no perfect way to disable it, only various workarounds. Windows assumes that when you try to access the optical drive and no disc is present, then you would want the opportunity to insert one.

    There are a few very simple workarounds which don’t require any special actions. One is to right click on a drive to access it instead of left clicking, which isn’t very useful when you’re so used to left clicking. Another is to leave a disc in the drive at all times so that if you click on it, you will see the contents on the disc instead of it ejecting. Again, not something you might find acceptable. Here’s a few other workarounds that aren’t perfect, but are more useful.
    (more…)

  • 10 Ways to Browse the Internet and Use your Computer Without a Mouse or TouchPad

    Maybe your mouse or touch pad at your laptop is inoperable, or maybe you forget to bring it with you. Perhaps you are having USB driver problems, and your mouse isn’t working properly or at all. A computer can still work without a mouse but it is very tough to navigate around Windows. You have to know the correct shortcut keys to be able to open programs, get around the desktop and work inside programs. Windows has hundreds of shortcuts, at least some of which will need to be learned.

    Browsing a webpage in your web browser without a mouse can potentially be an even more painful experience because you’ll end up having to hit the Tab key loads of times to cycle through all the links on the page to get to the one you want to access. What will make things easier if you have to use the keyboard instead of a mouse or touch pad, is having it behave like a mouse so you don’t have to learn tons of shortcuts. Or at least make it easier and more efficient to navigate your way around a webpage.
    (more…)

  • How To Make a Windows XP Install Disc That Includes Drivers

    Although Windows XP is no longer officially supported by Microsoft it’s still a hugely popular operating system. Now is obviously a good time for people to move to Windows 7 or 8 if possible, but not everybody can or wants to completely leave XP for various reasons. Time moves on though, and things like software compatibility and especially driver support will eventually become more of a problem if you use newer hardware for your Windows XP equipped computer.

    One area where Windows Vista, 7 and 8 have greatly improved over XP is driver support out of the box which is partly why the XP install disc is a CD and the others are a DVD. This is obviously a great help because having the video, motherboard, drive controller, sound and networking hardware detected and the drivers installed automatically can save time and effort, especially if you can’t access the internet to download any drivers because your network adapter has no driver installed.

    It can become quite tough finding all the right drivers when you reinstall Windows, some may come from the manufacturer website, others could be for unknown or discontinued hardware. DriverPacks is a set of hundreds of drivers which you integrate into a Windows XP install disc, and then while Windows is installing, any needed hardware drivers contained in those packs are automatically installed as well. It’s a nice solution when you have to do nothing but wait a few extra minutes instead of playing detective or using another computer to get your drivers for a clean install.
    (more…)

  • 5 Freeware To Fix Problem Ejecting USB Mass Storage Device Error

    There are 2 drive removal policies in Windows which are quick removal for convenience or better performance for speed. By default the “Quick Removal” policy is selected to disable the write caching on the device so that you can conveniently unplug the USB flash drive without the need to eject the drive from Safely Remove Hardware. Even though the quick removal policy is enabled, you should always try to use the safely remove hardware icon whenever you can because there is always a risk of data corruption.

    USB removal policy

    An example is when you copy a file to or from the USB flash drive, you will see that the LED is blinking which means there is an activity going on and you shouldn’t unplug the drive or else the file that is being copied will get corrupted. There are times when the drive doesn’t appear to be in use, a file can be locked to the drive in the background which is when Windows will report that “This device is currently in use. Close any programs or windows that might be using the device and then try again.”

    problem ejecting usb mass storage device

    If you’ve closed all visible programs that are attached to the USB flash drive but you’re still unable to safely eject, here we have 5 tools that are able to show the hidden locked files on the USB mass storage device and give you the options to unlock, delete or move the file.
    (more…)

  • How To Change Windows Default Save As or Open Location

    Whenever you open a file from any program or try to save a file using “Save As”, most of the time the default location would be either Desktop or My Documents. I did a little research and found out that it can’t be changed. However, at the left side of the “Save As” dialog, you will see 5 locations which is My Recent Documents, Desktop, My Documents, My Computer and My Network Places that has been preset for you to save.

    Those 5 locations are called the “Places Bar” and it is supposed to be a convenient way for you to save it to the preset location. The “Places Bar” concept is a good idea, but not everyone regards those five default locations as the most suitable for their situation.

    Change default save as location

    If you’re working on something that frequently needs to save files to other than one of the preset locations, you can change the default save location, so you don’t need to browse to the location each time you want to save. I will show you how to easily you can change the Windows default Save As or Open Places Bar Locations. This method is only for Windows XP and will not work on Vista and 7. There is another article covering newer Windows operating systems such as Vista and 7 although the tools mentioned do also work with XP.
    (more…)

  • Disable or Stop Auto CHKDSK During Windows Startup

    One of Windows annoying so called “features” is the Windows disk checker (Chkdsk) being automatically executed whenever you don’t shut down your computer properly. The blue colored screen appears on Windows XP or black colored screen for Windows Vista and 7 during boot that says:

    Checking file system on C:
    The type of the file system is NTFS.
    One of your disks needs to be checked for consistency. You may cancel the disk check, but it is strongly recommended that you continue.
    To skip disk checking, press any key within 10 seconds(s).

    Simply pressing any key would stop Check disk from running but when you restart your computer, you’ll get this prompt again because Windows still thinks the drive needs scanning and will keep reminding you until it is checked. Sometimes, even after letting Check disk scan the drive that it wants to, the checking process would still automatically run at next boot and it wants to check the drives again.

    Disable CHKDSK at startup

    What we have found out is that when Windows detects there has been an improper shutdown or a drive such as a USB flash drive has been ejected before the system has finished with it, a secret value is stored on the drive to let Windows know about the issue and force a Check disk request. This value is known as a “Dirty bit” and is a single hex value (2 values for Windows 8) that Windows looks at on boot for system drives or when the the external device is inserted.
    (more…)

  • How To Disable, Uninstall or Remove Windows Defender

    Since Windows Vista, your operating system comes with an anti spyware program called Windows Defender. It’s a small piece of software that runs in the background to help protect your computer from various pieces of spyware and malicious software. Defender has been around since 2006 and although not a fully featured security application, it does at least offer some protection for Windows Vista and 7 out-of-the-box. In Windows 8, Microsoft went a step further basically renaming Microsoft Security Essentials to Defender, and it’s now an antivirus package as opposed to just small resident anti spyware tool.

    The problem with all Defender versions in Windows Vista and above is it’s integrated into the operating system and installs by default with no visible or hidden option to uninstall. Many people are looking for ways to disable, uninstall or remove it from their system as they prefer to use other software. Windows XP users at least have the luxury of choosing whether they want to download and install Defender in the first place as it’s a separate package, and then have the option to uninstall again through Add or Remove Programs.

    Luckily most of the time when you install a new anti spyware program or antivirus application that includes anti spyware, it should be smart enough to disable Windows Defender as your new software takes care of it from now on. However, if Defender is still running or causing other issues, you need to know how to turn it off manually or in more extreme cases remove it from the system completely. Here we show you how to do both.

    windows defender program is turned off
    (more…)

  • 5 Ways to View, Schedule Delete or Move Files on Next Windows Bootup

    Files that are currently opened or in use in Windows cannot be moved or deleted until they are closed. Most of the time closing the associated program would do the job but sometimes it still won’t work because its mapped to the memory or protected by another process. To solve this problem, most of us would simply rely on a third party software such as FileASSASSIN, LockHunter, IObit Unlocker, BlitzBlank and etc that is capable of detecting locked files and attempt to unlock them for further actions. Unlocking locked files has its own risk that can possibly cause crashes on the operating system.

    The safer solution is to mark the file for deletion on the next reboot and the Microsoft Windows operating system has made it easy for developers because it comes with a MoveFileEx API to delete or rename/move files the next time the system boots up. This task is performed by reading a registry entry called PendingFileRenameOperations located at HKLM\SYSTEM\CurrentControlSet\Control\Session Manager. Do note that the PendingFileRenameOperations registry key will not exist unless there is a pending operation.

    If you do not like messing with the Windows registry, here we have a few free tools that can help you read the PendingFileRenameOperations keys and display the list of pending file operations. Some of them have the capability of allowing you to schedule move and delete commands for the next reboot.
    (more…)

  • Map a Folder to a Drive Letter for Quick and Easy Access

    With hard drives having such huge capacities these days, it’s not unheard of for some people to have millions of files spread across their system. When you have a lot of files it is really important that everything is stored in a well ordered directory structure so files can be found more easily. For the less organized there are tools to quickly search the contents of your drives.

    Even if the overall directory structure of your system is efficient there might be several folders you access often that are found several layers down. An easy solution to get quick access to one of these folders is mapping it to a drive letter. This is a simple method and means instead of constantly drilling down through sub folders, just click on the drive in Explorer and you are taken directly there.

    Of the 26 drive letters available on your system, probably only a few are in use. That leaves several free letters that could be used for this purpose. Although it’s easy to map a network folder to a drive letter, mapping a local folder to a drive letter is slightly more difficult. Here are some ways to do it.
    (more…)

  • 2 Ways to Integrate Floppy SATA RAID Driver into Windows XP CD

    One of the major problems that has plagued Windows XP is it’s never had the facility to install itself onto some newer hardware without the need for extra steps. Although SATA, AHCI and RAID enabled storage controllers have been around for several years, the Windows XP install CD never gained the ability to install directly onto this hardware, and you need a floppy disk with the necessary drivers for XP to be able to recognize your hard drives during setup. If you don’t use a driver floppy, you will get the dreaded “Setup did not find any hard disk drives installed in your computer” error.

    Download a floppy SATA/RAID driver, extract it to floppy disk and then when installing XP, you need to press F6 at the specified time to install the driver. However, most desktop computers and all laptops don’t come with a floppy drive these days, and what makes it worse is you cannot use anything else such as a USB stick to put the drivers on, it MUST be a floppy drive. Although you can use an external USB floppy drive, it would be a waste to buy one just to use it for installing Windows XP. Recently we found a workaround that can enable you to install the SATA drivers from a USB flash drive after pressing F6, but this solution is known to be not 100% working on all computers.

    In order to get around having to use a floppy drive, you can integrate the floppy SATA/RAID driver into the Windows XP CD yourself. This way, you can install Windows XP on a SATA hard drive without using a floppy drive at all because the driver is already present on the CD. You’ll need to have an XP CD or the source files contained on one stored on your hard drive, the floppy SATA/RAID driver which can be downloaded from the motherboard manufacturer’s website and a CD/DVD writer.
    (more…)

  • Double Click C Drive at My Computer And Not Opening Fix

    With the popularity of USB removable media, more and more viruses started to appear that could take advantage of the ease at which these devices can be transferred from machine to machine using plug and play. It was quite easy to rewrite the Autorun.inf file to launch the malware on insertion of the drive because in general it is not write protected. It’s not just on removable drives that the autorun file can be created on though, it can be burned to a CD/DVD and also created on local hard drives including the system drives.

    An autorun.inf file at the root of your local drives can be problematic because when you open My Computer and try to access a drive, it could run a virus to infect your computer. Quite often antivirus software doesn’t touch autorun.inf because it’s only an instruction file that tells Windows what to automatically run when you access the drive from My Computer, not the malicious file itself. So even after the virus has been cleaned, you might find that you’re unable to access your C drive because autorun is pointing to the removed virus. A search window could appear, a script/file might try to to run or when double clicking your drive, it gives you an option to choose a program to open instead.

    While this issue is greatly reduced these days because Windows Vista and above won’t process the Autorun.inf file on any devices apart from CD-ROM drive types, it’s possible to still get this problem on XP, especially if the system isn’t fully patched. Usually the autorun.inf cannot be easily deleted because it has protected attributes, although expert users would have no trouble bypassing this. This procedure might be tougher for a normal user. Here’s 3 tools to easily delete the autorun file restoring the double clicking a drive option in My Computer.
    (more…)

  • 6 Ways to Restrict or Disable Mouse Right Click on the Desktop and in Programs

    We all know what the right click context menu is in Windows and how it works. At its best, the menu can be a hugely valuable resource to get certain tasks accomplished more quickly than digging through programs and their settings to do the same thing. But what if this menu is getting in your way for some reason and you want to disable it?

    Perhaps you or your children are playing games in a browser and keep accidentally right clicking when you don’t want to, or you just don’t want somebody inexperienced to have access to the quick options of renaming or deleting something on the desktop in case they delete something they shouldn’t. Disabling the right click of the mouse might sound like a simple thing, but you can’t just press a button in Windows to turn it off without a piece of 3rd party software or going deeper into the system settings.

    Here’s a selection of 6 solutions to enable you to turn off the right click of the mouse so the context menu isn’t called and can’t be triggered by accident.
    (more…)

  • 7 Ways To Recover CHK Files Created by CHKDSK and SCANDISK

    One of the things about Windows is sometimes it seems to do things in a way that doesn’t really make a great deal of sense. One of those situations is when an improper shutdown is detected or something like a USB stick is detached too quickly and Windows decides it needs to run a scan of the drive for errors, which in itself is not a problem. If you decide to skip, Windows will continue to ask you to scan because the dirty bit is still set on the drive. You let Chkdsk or Scandisk run and it will repair any problems with the file system and recover or repair any corrupted files affected because of it.

    Windows chkdsk

    The issue arises when you want to look at the files to see if any personal or important data has been affected because everything recovered by Chkdsk or Scandisk now has a generic filename of File****.CHK placed in a Folder called Folder.*** at the root of your drive! The odd thing is Windows has no utility or built in function to let you find out what these newly renamed files were before it changed them all to CHK files.

    Although sometimes a CHK file cannot be recovered successfully because it has been too badly damaged, many of them can be used again, but you need to find out what type of file each one is and the correct extension needs to be applied. If Windows crashed while editing a document, there is only 1 CHK file and your document is missing, then renaming the file to mylostfile.doc could be worth a shot, but in most situations you won’t be so lucky or there’s a lot of files that need checking.
    (more…)

  • Find Out the Command Line Location When Windows Opens a Process

    When you visit a lot of pages on the web looking for tips, tweaks and repairs, very often you will see people using command line arguments that you didn’t realize existed for that particular function or tool. Have you ever wondered how they find out what these shortcuts and command line arguments are? Do they actually find out themselves or do they look in the Microsoft Knowledge Base or search Google?

    A simple example is in the article for how to open the Safely Remove Hardware dialog box when the icon is not located it the system tray. One way to fix it is run the command line “rundll32 shell32.dll,Control_RunDLL hotplug.dll” and the Safely Remove Hardware box will appear. As you can see, it’s a complex command and not as simple as running a single executable. It involves several different commands but how would you figure out something like this yourself?

    Finding out commands and arguments is very easy when you know how to do it and where to look. Here’s a couple of possible ways.
    (more…)

  • 4 Solutions to Restore Missing or Disappeared Safely Remove Hardware Icon

    We’ve previously written about a trick on how to hide or remove safely remove hardware try icon. Although the tip has it’s uses, it’s is probably not useful for most of us because the majority of users own a USB flash or portable hard drive nowadays and we need the Safely Remove Hardware icon to eject or unplug our USB device so that the files in our USB flash drive won’t get corrupted.

    Restore Safely Remove Hardware

    Although Windows by default chooses “Optimize for quick removal” in the Write Caching policies tab in the device properties window, there are times you might have noticed when you try to stop the plugged in USB flash drive or device at Safely Remove Hardware, it says “The device cannot be stopped right now. Try stopping the device again later.” If you forcefully attempt to unplug the USB flash drive during that time, there is a big risk any previously opened files will become corrupted and then you will have to depend on data recovery software to get back the files. So, never fully trust the “Optimize for quick removal” setting!

    There are times that the Safely Remove Hardware Icon is missing or disappeared from the system tray. In Windows Safe Mode, you can’t find the Safely Remove Hardware icon at all. Is shutting down or restarting the computer the only way to safely stop and unplug your USB devices? Fortunately not. Here are some ways you can bring back the Safely Remove Hardware window when the icon is missing.
    (more…)